We staff tested the TOPDON PulseQ EV charger. Here are the pros and cons of this popular EV charger based on first-hand experience.
I got the opportunity to review the PulseQ, the first EV charger offered by the automotive company, Topdon. In this article, I’ll be providing a breakdown of what you get with this charger, my initial thoughts, and the overall value I think this charger brings to the table. I’ll also discuss my experience using this charger and why I think it’s a great product for at-home EV charging.

TOPDON PulseQ EV Charger
Highlights: A level 2 EV charger that is easy to setup which charged out test Tesla Model 3 quickly and efficiently. WiFi enabled. Overall, an excellent choice for a home EV charger.
What Is the Topdon PulseQ?
The PulseQ is a plug-in electric vehicle charger, meaning it can be plugged into an existing 240v outlet for fast installation. Once you go through the set-up process and connect to WiFi through your phone, it gives you total control over when your EV gets charged and the speed at which you charge, and it gives you analytics for charging over time.
What You Get With the PulseQ
When you purchase the PulseQ, you get the actual EV charger box, a connector, a connector dock, a mounting bracket, drywall anchors for mounting, a quick-start guide, and an instruction booklet. I’ll briefly explain each of the major components in the following sections.
EV Charger
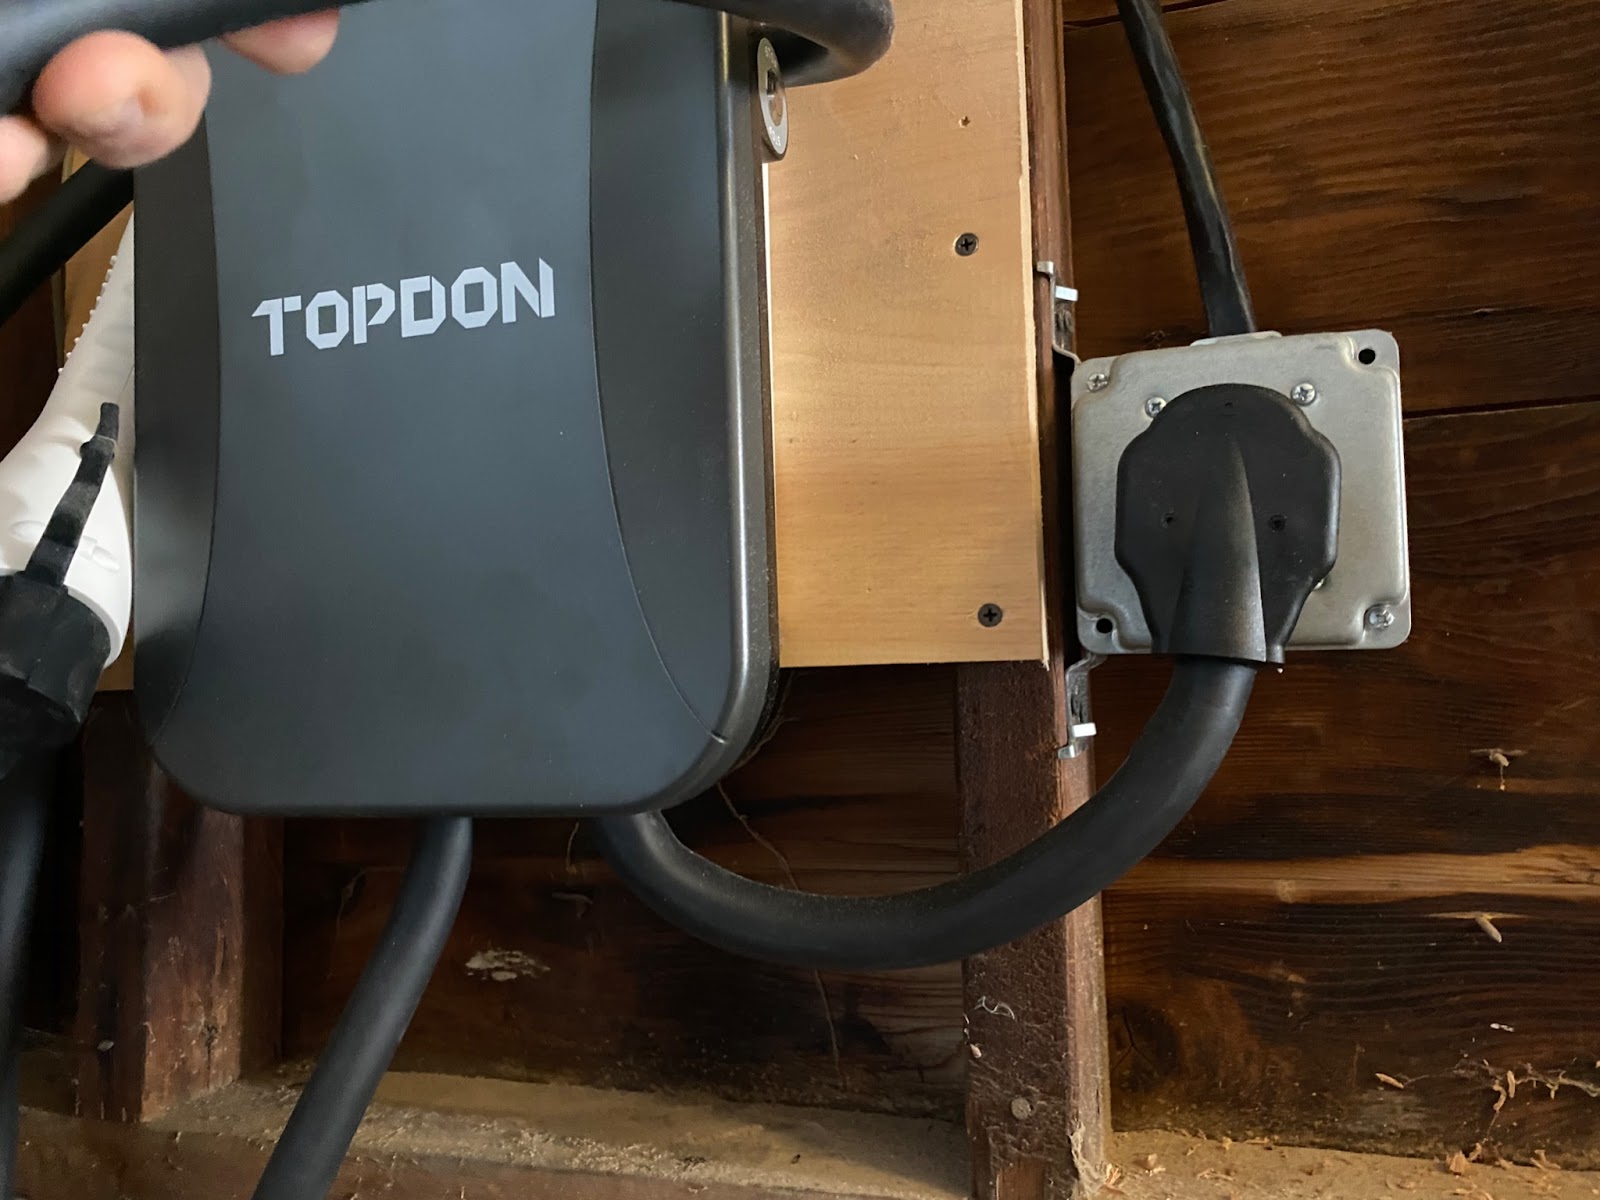
The EV charger box measures about 12 inches by 9 inches, and it sits around 4.5 inches out from your wall once it’s installed with the bracket behind it. The box has two cables: one that gets plugged into a 240v outlet, and one that leads to the connector that plugs into your EV.
The cable to plug the charger in is a little over a foot long, so you’ll need to mount the box directly next to your 240v outlet in order for it to reach. I do wish this cable was a bit longer, but if you plan out the installation, you shouldn’t have any issues.
The connector cable comes in two length options: 16.4 feet and 24.6 ft. I have the 16-foot cable but recommend the 24-foot one to give you some flexibility with where you park your car for charging, especially if you have a two-car garage.
The charger has four indicator lights on it:
- Power light: Indicates that power is running to your charger
- Charging light: Indicates that vehicle charging is in progress
- Error light: Indicates that there is an issue with your charger
- WiFi light: Indicates that your charger is connected to the internet
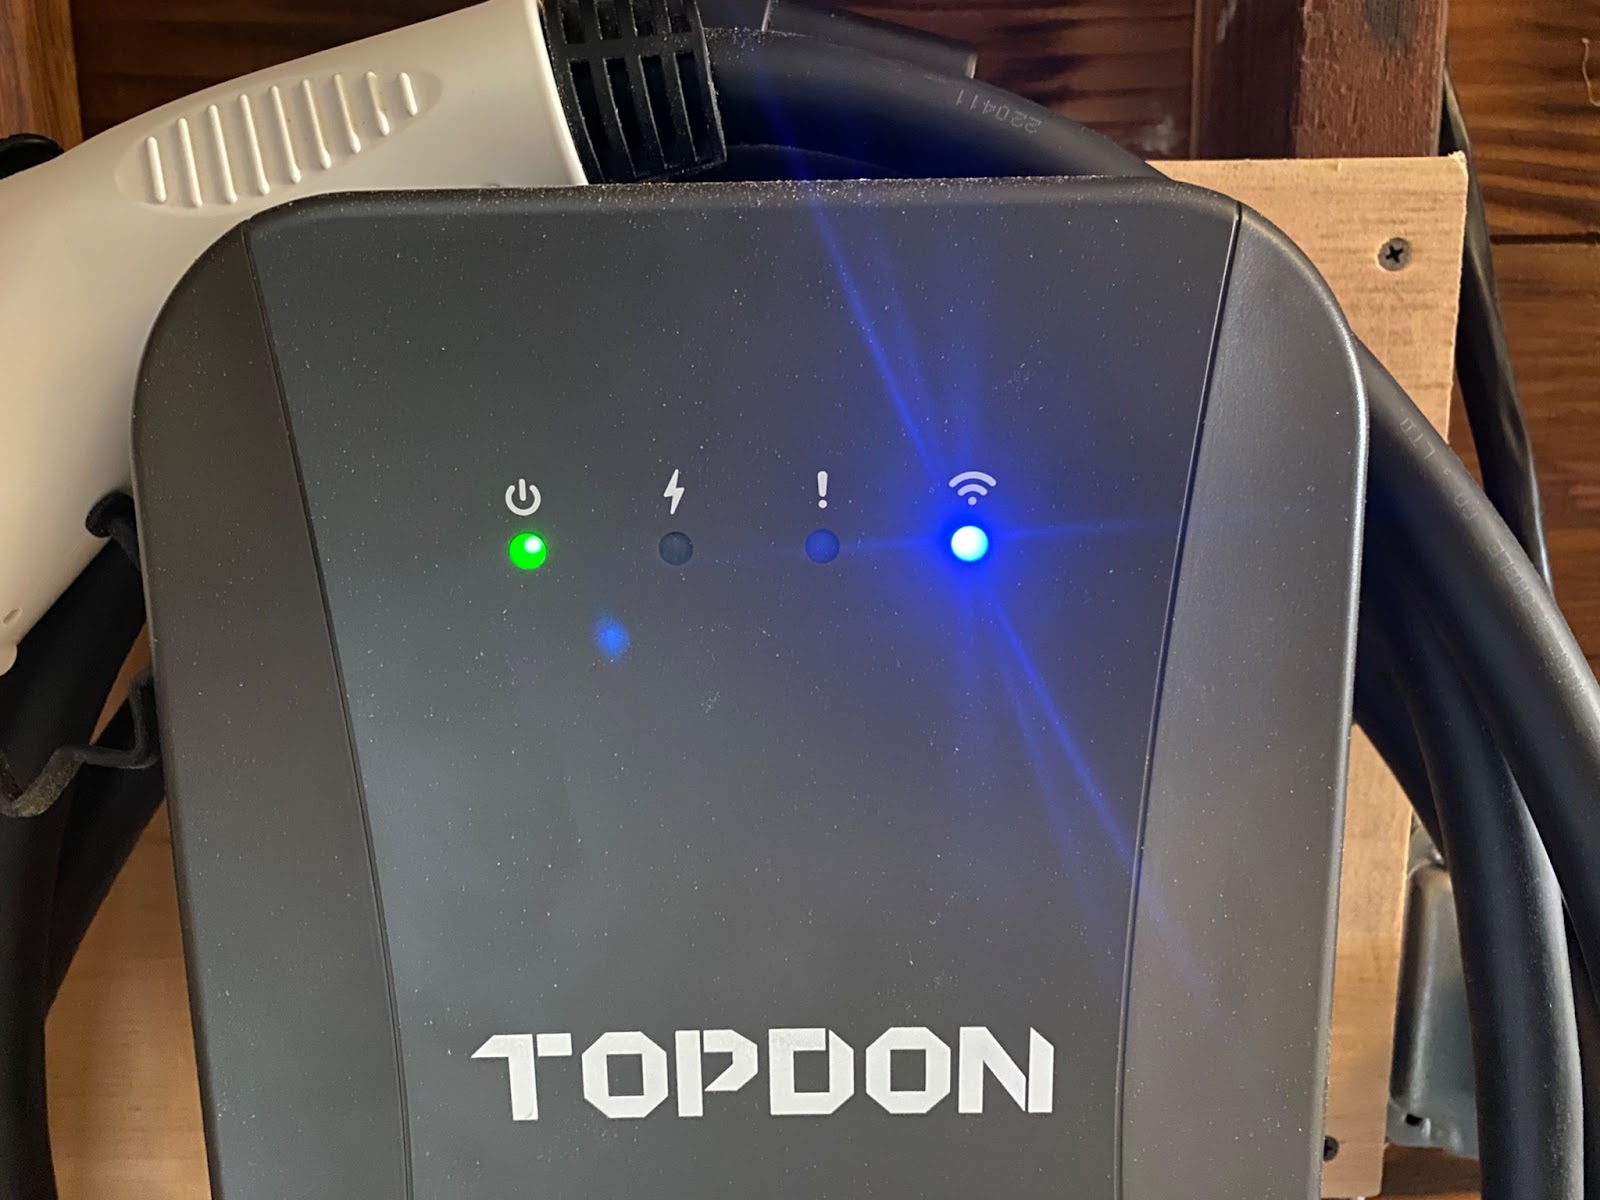
The charger also has an emergency STOP button on the side to shut power off immediately.
The charger is NEMA-4 rated, which means you can install it inside or outside. It’s water-resistant enough to stand up to normal weather conditions, like snow and rain.
Connector
The connector on the PulseQ has a SAE J1772 (Type I) plug at the end, so it will fit most EVs in North America.
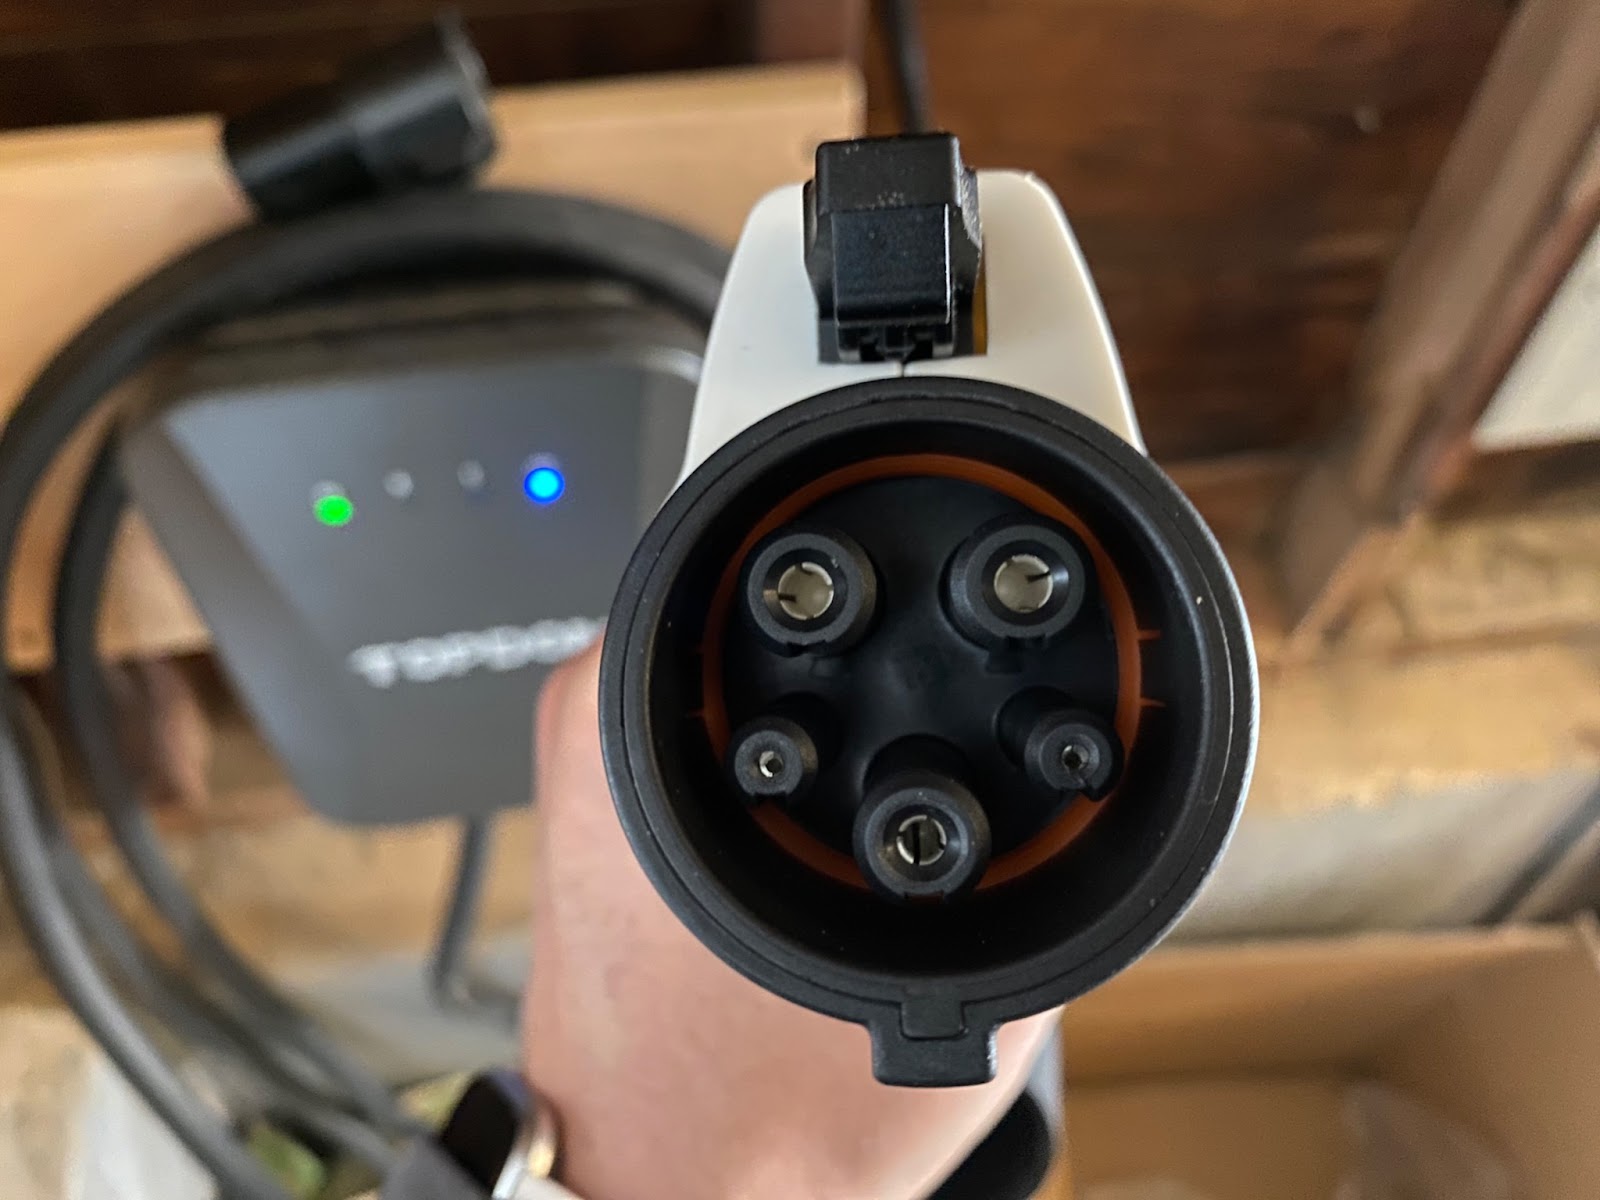
The connector feels relatively sturdy, for the most part, and I’d expect the hard plastic to hold up to dropping, even on a concrete garage floor. There is a single button that you can use with your thumb to release the connector, and this does feel a bit flimsy. Thankfully, this won’t prevent you from using your charger if it does break at some point.
The connector also has a rubber cap to cover the connection, keeping it safe from dirt, sawdust, and other debris. The cap is attached to the connector as well, so you’ll never lose it.
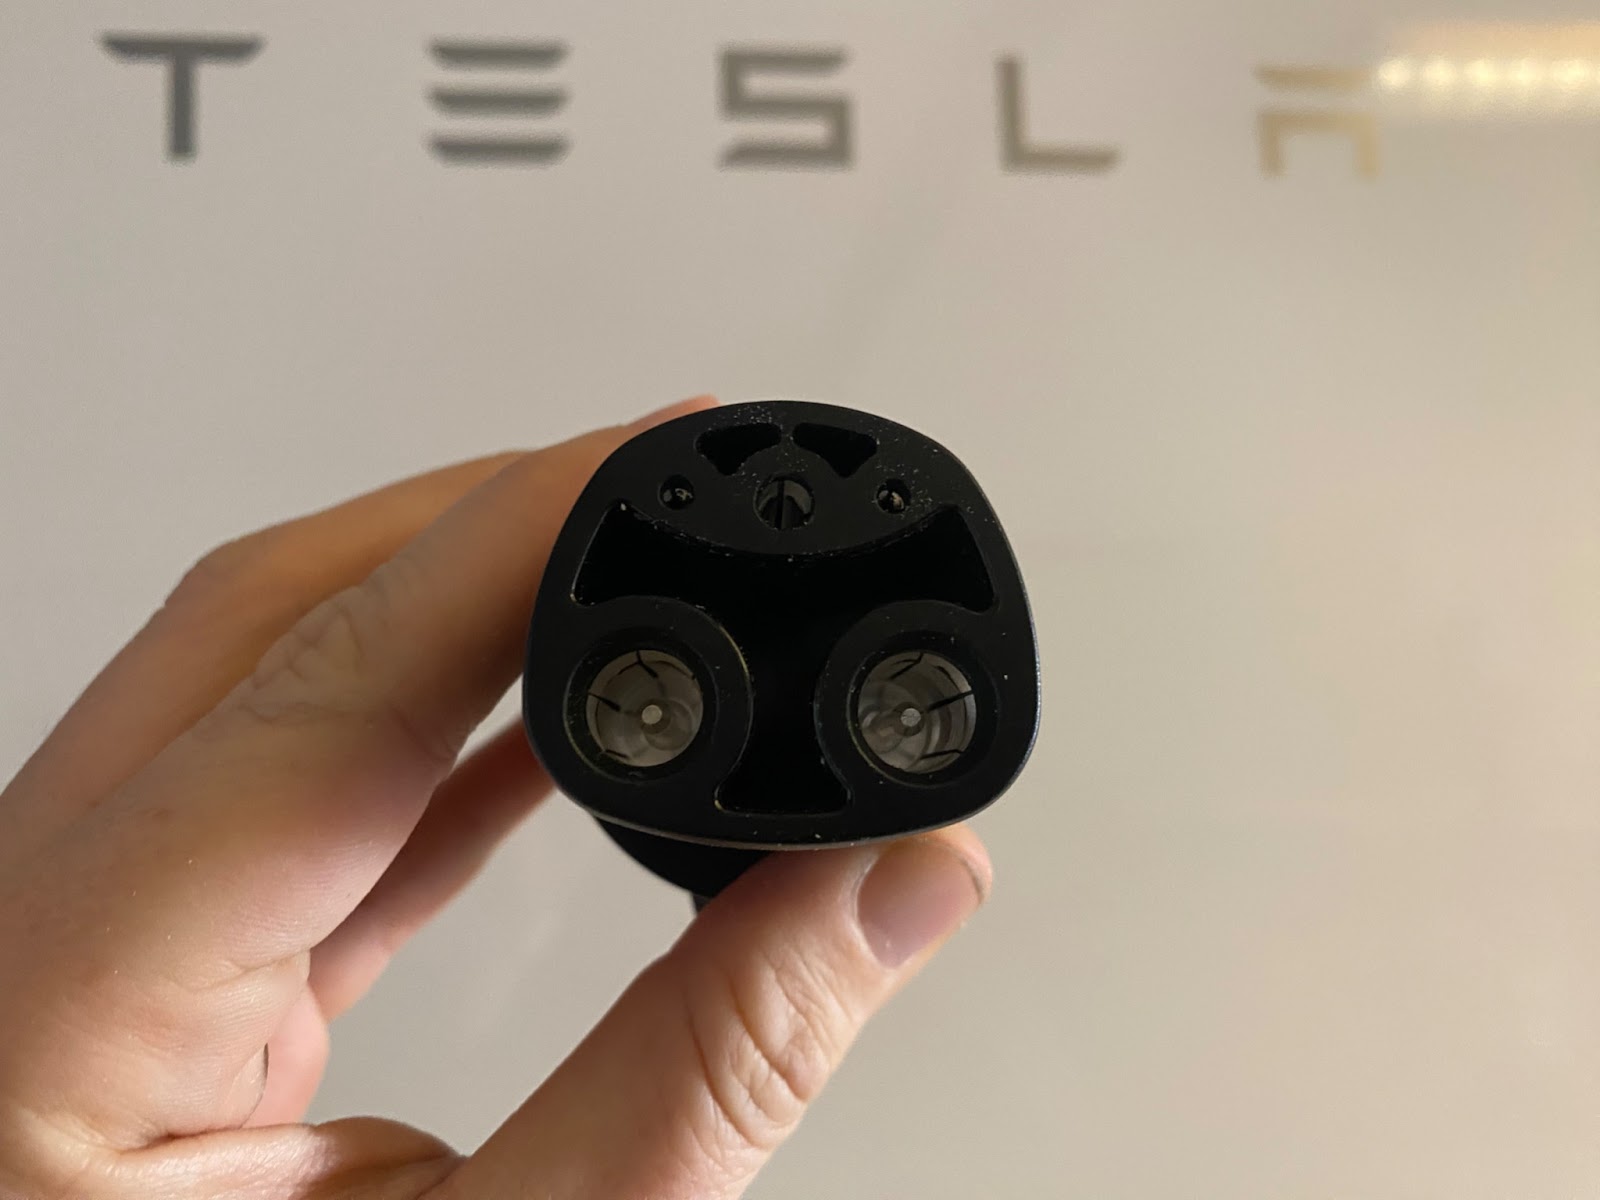
Just a quick note that the connector won’t fit Tesla’s proprietary plug, but you can buy a relatively cheap adaptor like I did to convert the J1772 to fit any Tesla model.
Connector Dock
In addition to the mounting bracket you get to install the actual charger box, you also get a mountable connector dock. This dock conveniently holds your connector when not in use. Personally, I just wrap the cable around the charger box when I’m not charging, but this is a nice feature that gives you some flexibility for storage.
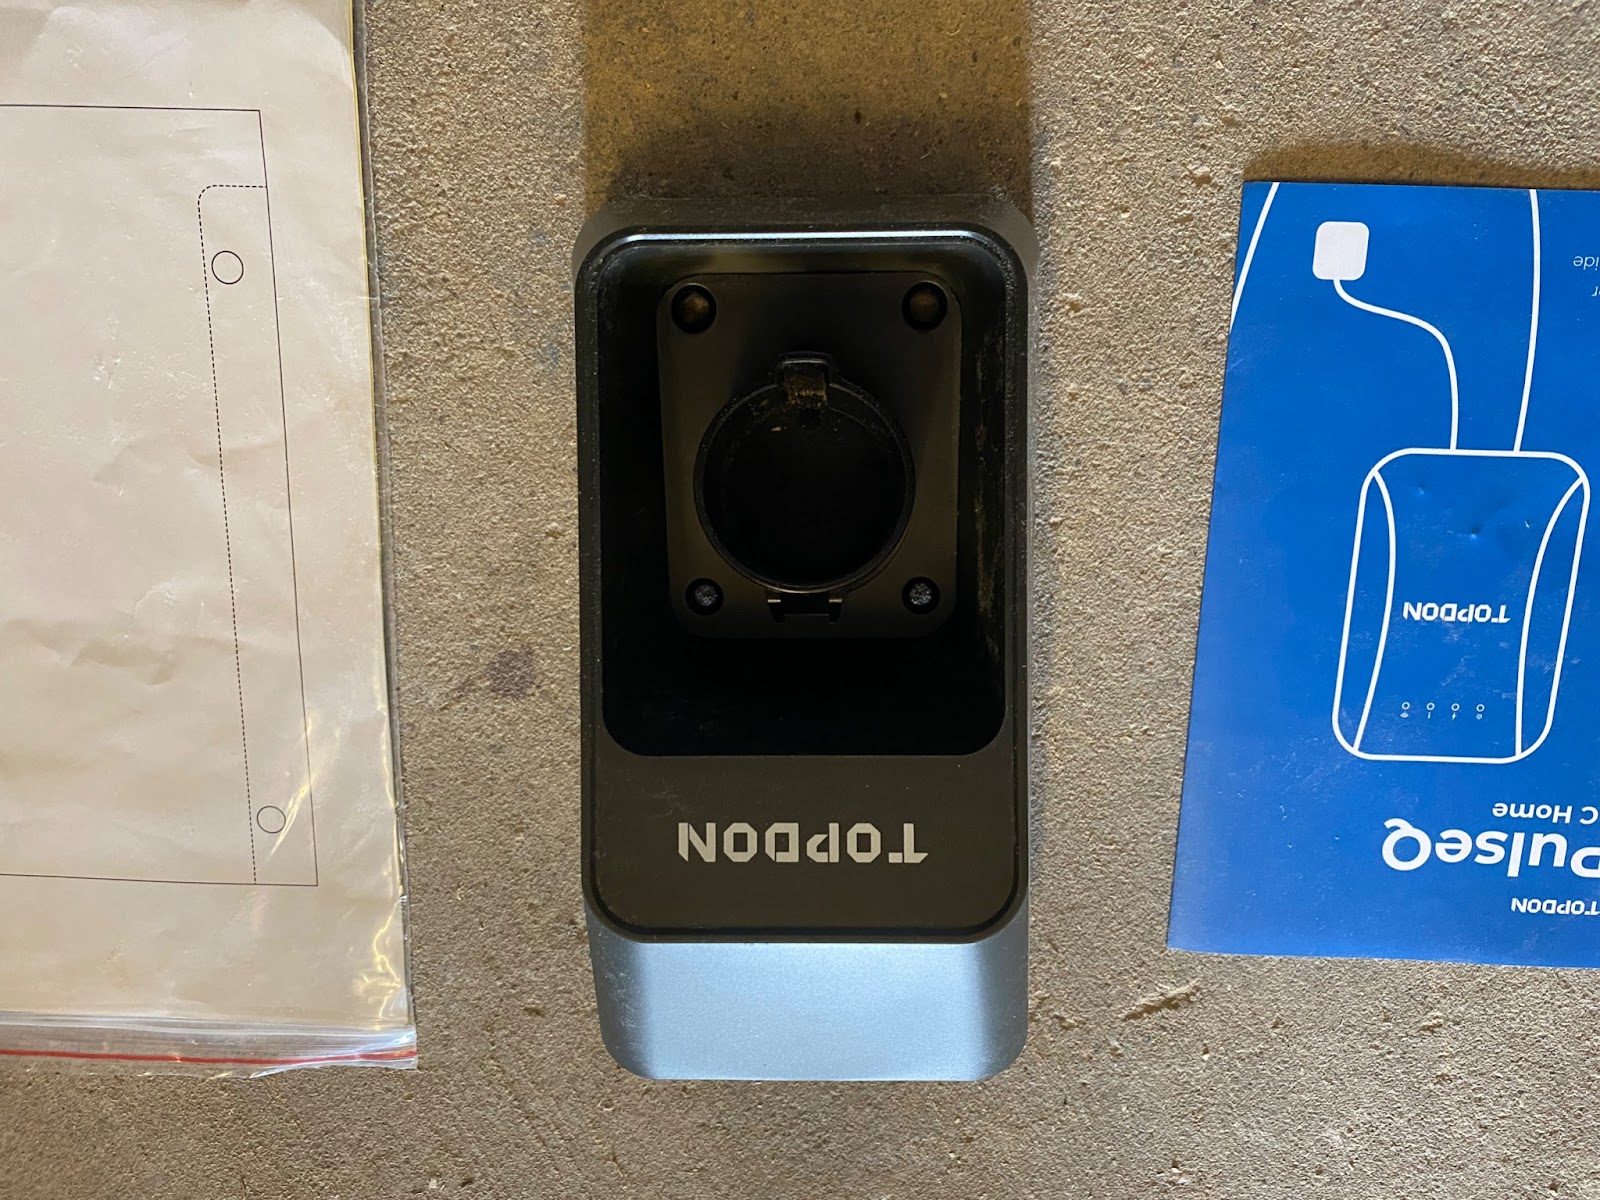
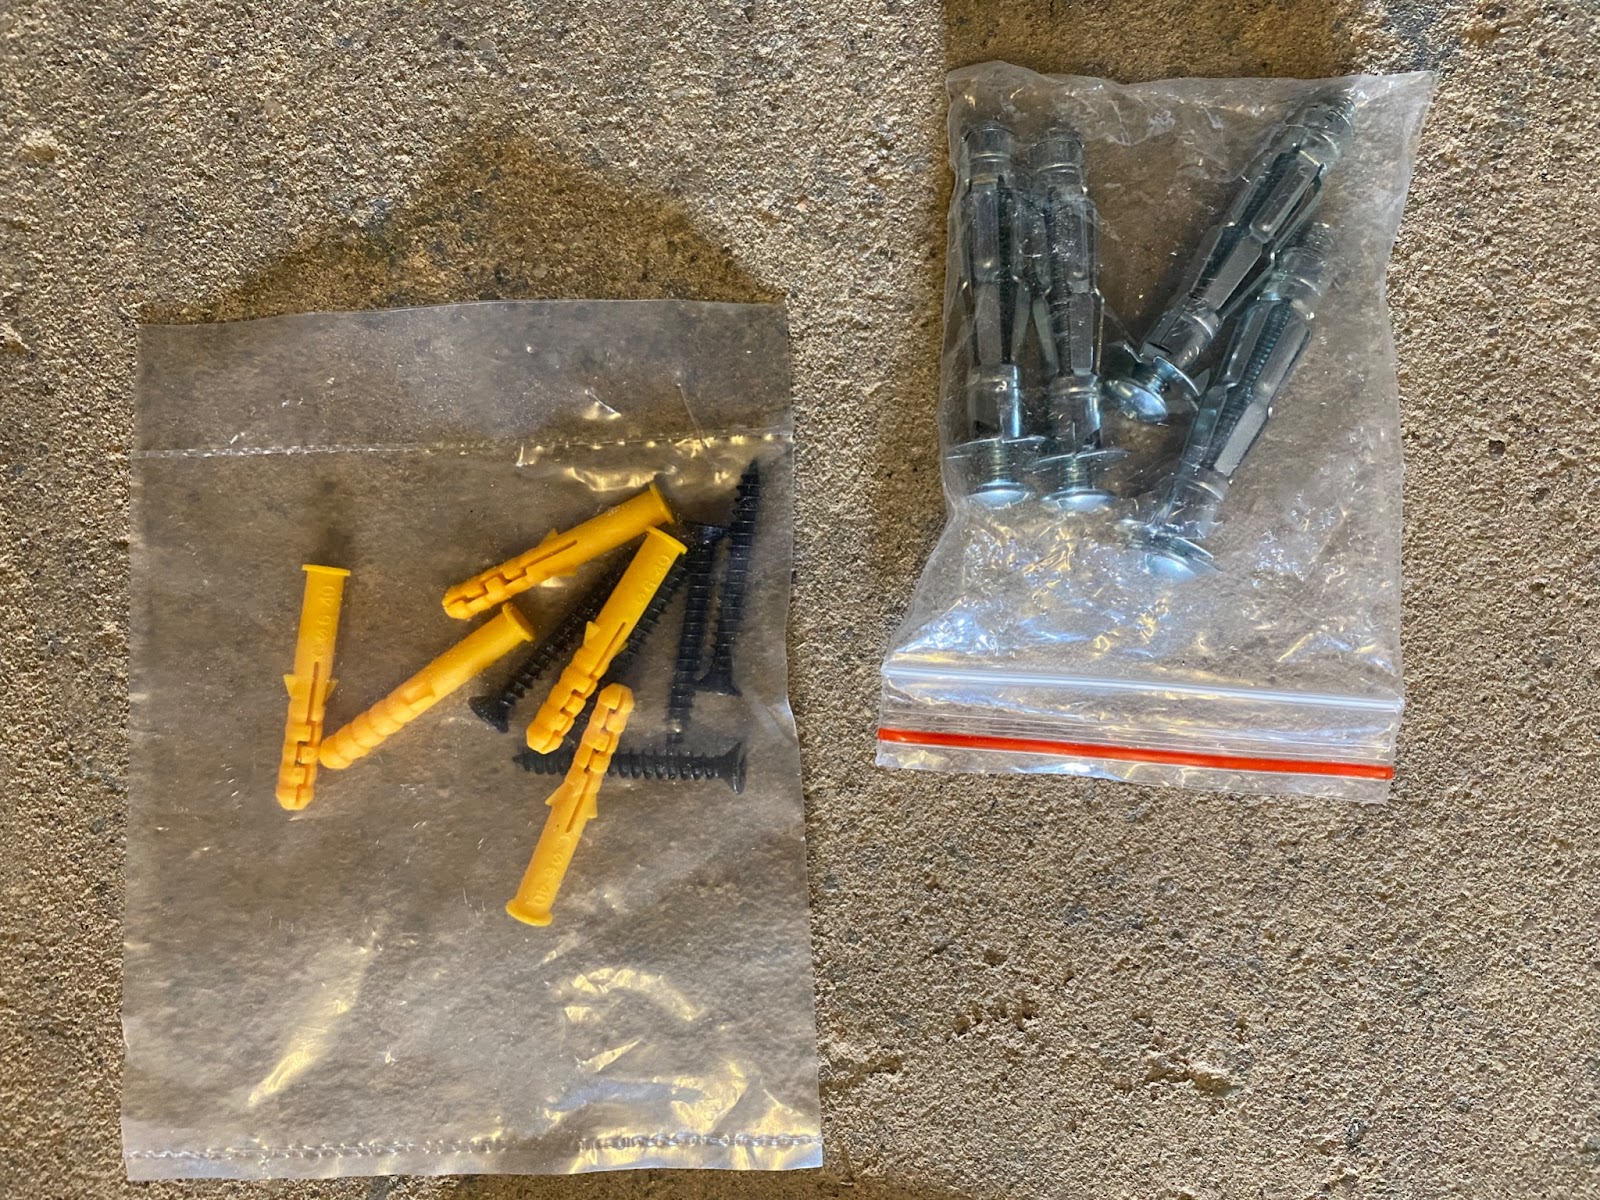
Mounting Equipment
Topdon includes a charger box mounting plate, drywall anchors, and screws to mount your equipment. The mounting equipment included is only intended for use on sheetrock. I came up with a quick custom mounting solution using a piece of plywood. This is temporary for me until I insulate and sheetrock my garage, but it is an option long-term; you’ll just need some interior wood screws to install the mounting plate if you go this direction.
The included drywall anchors are super heavy duty. Normally, I toss the drywall anchors that come with most mountable products and just upgrade to better ones from a hardware store, but I wouldn’t feel the need to do that with these.
Topdon includes a paper template to make mounting simple, and the quick-start guide included should have you set up in just 10 to 15 minutes.
PulseQ Installation and Setup: How Easy Is It?
Installing the PulseQ is quick and straightforward. The mounting equipment is super easy to install, but you will need a drill and screwdriver to get the job done.
The mounting plates go up easily enough, and the charger box just slides onto the plate. There are two thumb screws that connect the box to the plate on the sides. The holes for these screws didn’t line up well for me, so it took a few minutes of maneuvering the box to get the screws in. This was the most challenging part of the installation and was complicated for me by the position of the box near the corner of my garage.
The manual says the installation should take around 15 minutes, and this is almost exactly what it took me, even with the screw issues.
Once the box is installed, you can plug it in and open the PulseQ app to start the setup process. You’ll have to make an account with Topdon and then bind your charger. I ran into some issues with the binding process before I realized you need to keep your phone right next to the charging box while connecting to the charger’s hotspot. You can then put in your WiFi network information and connect your charger to WiFi.
Finally, you can name your charger and your vehicle, choose the amperage—between 6 amps and 40 amps—and then get to charging.
Provided you don’t run into the same connection issues I did, this setup process takes just a minute or two.
TOPDON PulseQ EV Charger
Highlights: A level 2 EV charger that is easy to setup which charged out test Tesla Model 3 quickly and efficiently. WiFi enabled. Overall, an excellent choice for a home EV charger.
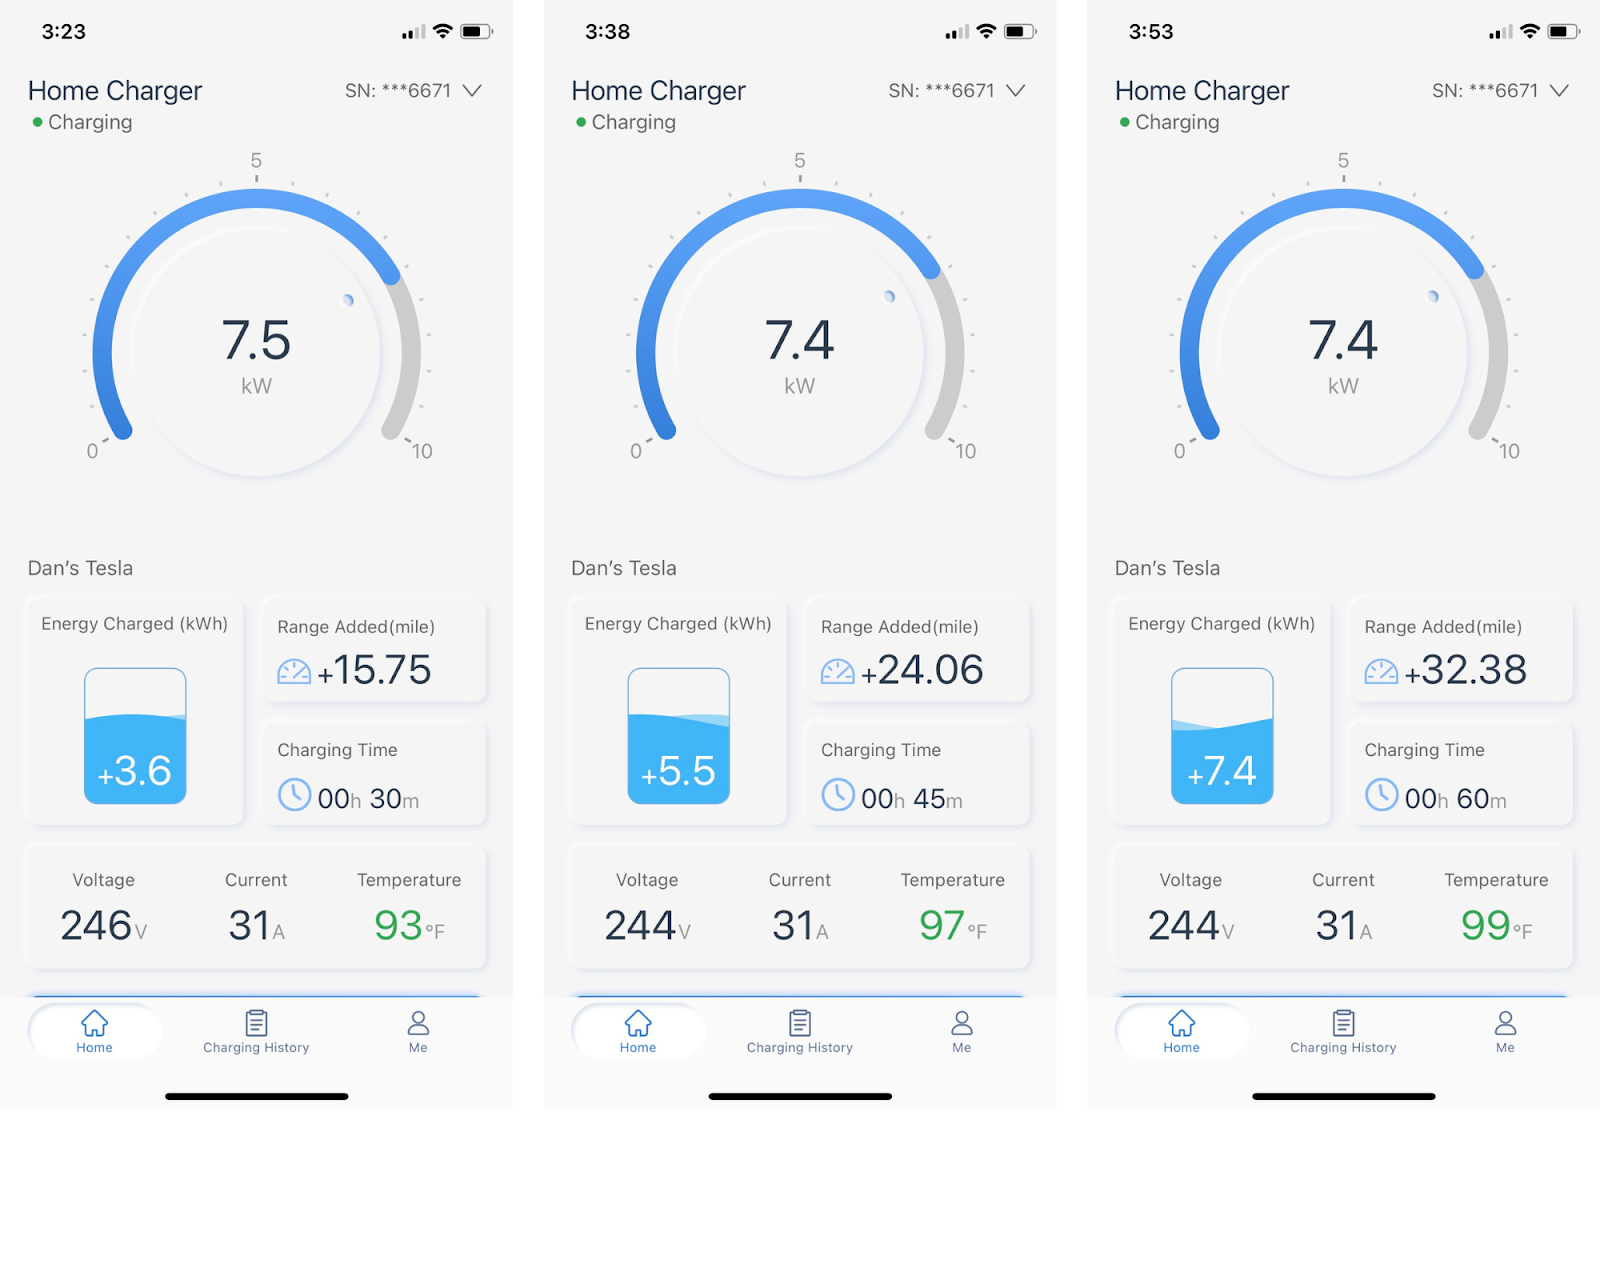
How Quickly the PulseQ Charges Your EV
When I first plugged the PulseQ into the Tesla Model 3 I was charging, the battery started warming up and then receiving charge. The charger added 3.6 kWh in the first 30 minutes and 7.4 kWh in the first hour, and this was with the charger set at 30 amps. It can go up to 40 amps, which would provide faster charging times.
With my first charge, I was able to add 32.38 miles of range in the first hour, which included battery warm-up. I’d expect the maximum range per hour to sit around 40 miles, especially if you push the amperage up to 40 from the app.
For reference, I’m including some estimated full-charging times for popular EVs using the PulseQ below. These are based on my personal experience with my first charge, so your numbers can vary based on a number of factors. Additionally, EVs won’t be charged 0-100%, so these numbers are just for reference.
| EV Make and Model | EV Battery Size | Estimated Time to Charge 0-100% Using the PulseQ |
| Tesla Model Y Long Range | 75 kWh | 10.14 hours |
| Tesla Model 3 Long Range | 75 kWh | 10.14 hours |
| Ford Mustang Mach-E | 91 kWh | 12.30 hours |
| Chevy Bolt | 66 kWh | 8.92 hours |
| Volkswagen id.4 | 58 kWh | 7.84 hours |
| Nissan Leaf | 40 kWh | 5.41 hours |
| Audi e-Tron | 95 kWh | 12.84 hours |
How the PulseQ EV Charger App Works
The PulseQ comes with a free mobile app that you can use to control your charger. It includes some features that make using the PulseQ super convenient. I’ll discuss some of those features below.
Customizable Car Profiles
The PulseQ app lets you create car profiles for your cars, which is an outstanding feature to have if you own multiple EVs. You enter in the battery capacity, preferred amperage (between 6 and 40 amps), and a charging schedule for individual EVs. These settings let you seamlessly swap back and forth between charging different cars without having to input preferences each time.
Charge Scheduling
You can either tap “Start Charging Now” when you plug in your car or schedule your charge to start at a specific date and time. You can set up repeating charging schedules, and you can set reminders to prompt you to plug in and start charging as your scheduled time approaches.
Charging and Savings History
The PulseQ app keeps track of all of your charging data. If you input your local electricity rates and gas prices, it will provide short-term and long-term savings information as well.
Topdon PulseQ: Is It Worth the Money?
Overall, I’m a big fan of the PulseQ. With a price tag of between $500 and $600—depending on where you get it and any discounts you might get—it’s more affordable than a bunch of the other EV chargers I’ve considered buying in the past with similar features. I feel that the Topdon is feature-rich enough and provides all of the data you might want in an EV charger.
The installation is simple and straightforward, although I did run into some minor issues with getting two mounting screws in and connecting to the charger’s hotspot. However, the entire process from box opening to charging was about 15 minutes, which isn’t bad at all.
The components feel like they’re high-quality, and I expect this charger to last for years to come. It also charges as quickly as some of the more expensive at-home chargers out there, so I feel like the PulseQ provides excellent value for the money.
Wrapping Up: Why I Love the PulseQ
The PulseQ is easy to install, relatively simple to connect to WiFi and set up, and has all of the features I look for in an EV charger. With a price tag between $500 and $600, I can comfortably recommend this charger to anyone looking for an affordable, easy-to-use, robust EV charger for home use. The only situation this might not be ideal for is if you have multiple EVs and want to be able to charge both at one time with a single charger.
TOPDON PulseQ EV Charger
Highlights: A level 2 EV charger that is easy to setup which charged out test Tesla Model 3 quickly and efficiently. WiFi enabled. Overall, an excellent choice for a home EV charger.